What the heck is this new trend called, Color correcting all about? To keep this short and understandable, it is using certain colors on top of imperfections, to change their color to help them conceal better! You get it?

Its kind of like if you are back in Art class, at least its not math class! 😁..
You use the wheel, to see which colors cancel out other colors. So using the wheel you can see that Green cancels out Red, Yellow cancels out Purple, Orange cancels out Blue.
So let’s dive into this a little further! I used the Maybeline Mastercamo to help cover some of my trouble areas. Looks like we are getting ready for halloween? LOL.

So, lets go over what I used to conceal what!
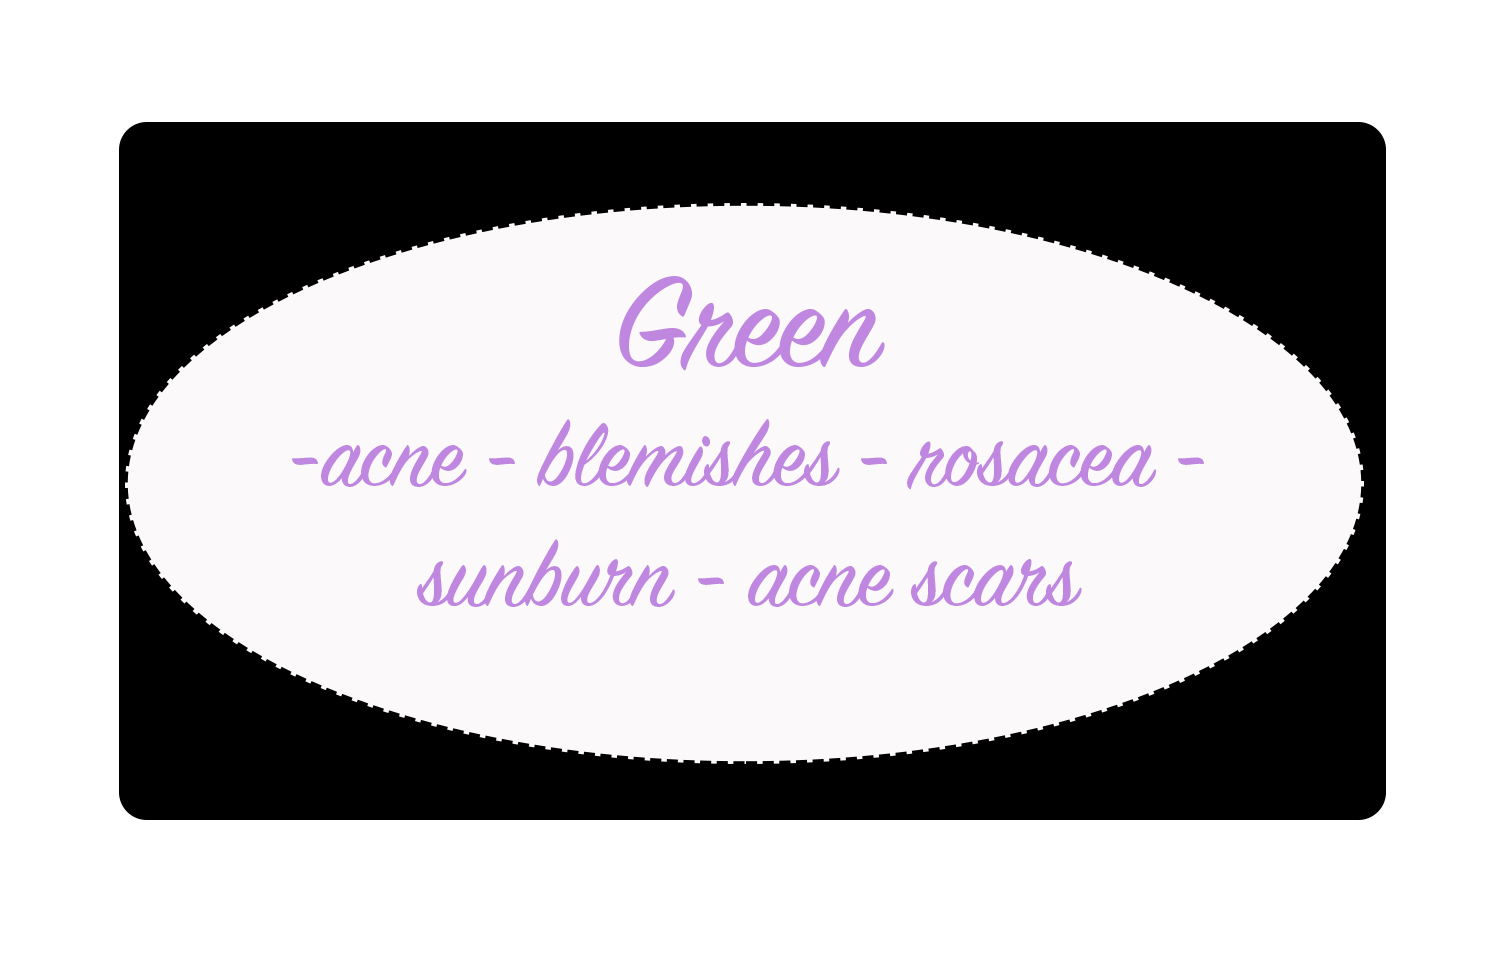
For my breakouts (acne) and any other redness you have on your face you use the color Green! I had a few acne spots and redness around my nose, so I added some green to those areas. If you have Rosacea this is the color you would use to help neutralize the redness.

Now to move onto Orange/Pinks/Salmony colors. These are best to get rid of the annoying dark circles you have! I used the peachy color under my eyes to help neutralize the dark circles! I also added some of this color over a small acne scar I have. If you have any hyper pigmentation, this is the color you would use.
Orange is for Darker skin tones – Peachy pink colors are for lighter skinned.

Now for the yellows, this color is used to brighten the skin and even out skin tone. This is a color I do not use much, however I do use it over my eyelids to help even out the coloration. If you have any purple discoloration near your eyes, this is the perfect color to help neutralize that.

Purples are used to help brighten dull skin, this is another color I do not use much. However, if you have any areas on your face that look dull grey toned, use purple to help neutralize that. However, if you are light skinned you should use peach instead!
Great, so now we have gone through all the colors! Now for the important part, do not cake color corrector on you face! this is not a concealer, it is designed to help neutralize a color, therefore you only need to put the smallest amount on top of the discoloration area. If you add too much, your makeup could look cakey and the color could seep through your foundation! (clown much)!…
After your color corrector is applied, you move onto your foundation. Do Not buff your foundation on with a brush, or you will move around all your color corrector! Use a beauty blender or a sponge, to gently press your foundation on your face! Then next you will add your concealer and powder.
Remember! Color correcting is to Neutralize not to Conceal!
Hope this helps you out! If you want to watch an in depth walk through color correcting watch my Youtube channel below:
https://www.youtube.com/edit?o=U&video_id=SpVfZCKiR3k
xoxo
Christina Brooke!
Products used:
Maybeline MasterCamo http://go.magik.ly/r/theglamran/55d85/


Color correcting is probably a life saver for me 😂 I really like this post- it really describes the different colors for correcting well!
Happy you like it!!
Great tips 🙂 thanks for sharing!
Anytime